
Protect Wooden Dining Table the Right Way


A cold glass has left a pale ring beside the dinner plate, and the sunny end of the dining table looks a little different from the rest. The temptation is to reach for furniture oil and give the whole top a generous coat. But the right protection starts with knowing whether the problem is moisture, heat, a worn finish, or the room itself.
For homes across South Georgia and North Florida, protecting a wooden dining table means balancing everyday use with warm coastal conditions. A beautiful table shouldn't feel too precious for Sunday lunch. With sensible placement, finish-compatible cleaning, and a few well-chosen barriers, an heirloom-quality piece can remain part of a comfortable, lived-in home.
Ideal Humidity and Placement for Protecting a Wooden Dining Table
Keep the room near 45%–55% relative humidity, ideally about 50% ± 5%, following the National Park Service's guidance for wooden objects. That guidance says humidity should never exceed 65%, while coastal environments may tolerate approximately 55%–60%. These are conservation-based reference points, not a demand to turn a family dining room into a museum.
Wood exchanges moisture with the surrounding air even when the tabletop looks completely sealed. Uneven or abrupt changes can stress boards, joints, veneer, and coatings without a single drink being spilled. That's why another application of oil or wax can't replace a consistently conditioned room.
Indoor Targets for a Wooden Dining Table
The humidity bands below follow the conservation guidance above. For temperature and the pace of environmental changes, The Henry Ford's furniture conservation guide recommends 70–75°F year-round and seasonal humidity changes of no more than 5 percentage points per day.
| Condition | Target | What goes wrong outside it |
|---|---|---|
| Everyday relative humidity | 45%–55%, near 50% | Movement, joint stress, and finish failure |
| Coastal summer humidity | About 55%–60%, never above 65% | Swelling if humidity climbs; drying if air conditioning overshoots |
| High-humidity danger zone | Above 70% | Swelling, mold, insects, weakened glue, finish bloom, and corroded hardware |
| Dry-air danger zone | Below 30% | Splits, brittle finish, dried glue, and loose joints |
| Room temperature | 70–75°F year-round | Localized heat and temperature swings can stress finishes and joints |
| Seasonal humidity change | No more than 5 percentage points per day | Abrupt changes can contribute to cracks and lifted veneer |
A hygrometer measures relative humidity in the room, not moisture inside the tabletop. Place it near the dining area, away from direct sunlight and vent discharge, so the reading represents the table's surroundings rather than a concentrated stream of hot or cold air.
A single reading provides a snapshot. Readings taken during ordinary cooling, rainy weather, and periods when the house is closed reveal whether the room remains reasonably consistent. The practical aim is a stable middle range, not constant thermostat adjustments in pursuit of a perfect display.
Place the Dining Table Before Adding More Products
Move away from concentrated heating and cooling. Keep the table outside the direct path of HVAC discharge, radiators, baseboard heaters, fireplaces, and strong lamps. A tabletop beside a vent can experience a different environment from the rest of the room.
Check the sunlight across the entire day. A spot that looks shaded at breakfast may receive strong afternoon sun. Curtains or shades can reduce exposure, while moving the table away from an exterior door limits sudden changes whenever the door opens.
Use steady conditioning in occupied homes. Repeatedly allowing a room to become muggy and then cooling it aggressively creates avoidable environmental changes. Comfortable, consistent operation is a better starting point than treating the tabletop after movement appears.
Choose placement carefully in a rental. An interior-wall location away from vents and exterior doors may be more practical than changing the HVAC system. A small hygrometer helps identify whether that location is more stable.
Bring vacation homes back gradually. After an extended closure, allow the room to settle before installing extension leaves or hosting a large gathering. If the house remains persistently damp despite normal conditioning, address the moisture problem rather than covering the table.
Store leaves in a comparable environment. A leaf kept in a damp garage may not fit a table kept indoors. Check leaves and extension hardware during seasonal housekeeping, and never force a swollen leaf into an opening.
Practical rule: Protect the room conditions before treating the wood. A shiny surface doesn't prove that the table's environment is suitable.
Proper preparation matters before a table ever reaches a dining room, too. Understanding kiln-dried hardwood helps explain why well-prepared lumber and thoughtful household care belong together. Drying establishes a useful starting condition; the home determines what happens afterward.
For a coastal dining room, the most protective layout may be slightly farther from the picture window than the original design suggested. That modest adjustment can preserve the view while keeping the table away from concentrated sun, door traffic, and strong air currents.
How to Shield the Top Every Day
A weeknight supper and a crowded holiday table need the same basic protection: a clean surface, suitable barriers, and prompt attention to spills. The Indiana Historical Society's wooden-furniture guidance identifies water rings and heat damage as preventable risks and recommends checking surface stability before cleaning.
A Gentle Cleaning Routine for a Stable Finish
The Conservation Center for Art & Historic Artifacts' housekeeping guide limits wet cleaning to sound, stable finishes and recommends dry methods for moisture-sensitive wood. Its conservative approach is especially useful when a table includes veneer, inlay, or an older coating.
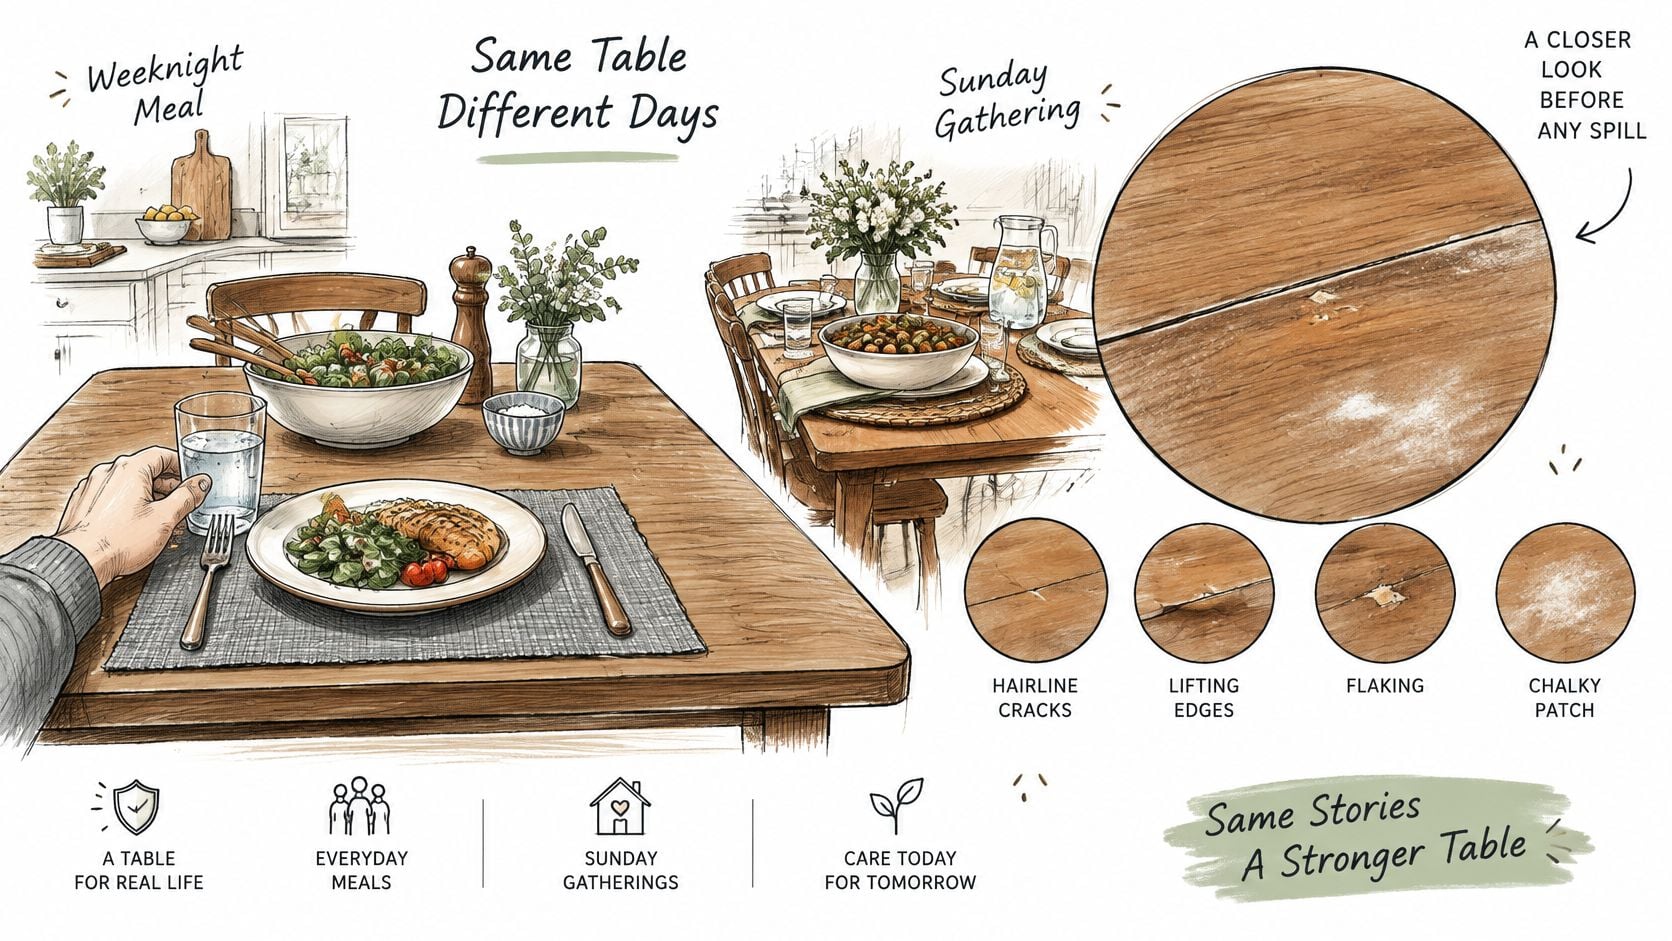
Inspect before adding liquid. Look for cracks, lifting, flaking, chalkiness, or a brittle-looking film. If the coating is failing, stop wet cleaning and arrange finish advice rather than trying to scrub the damage away.
Remove loose grit first. Use a clean, soft, lint-free cloth, moving with the grain, or a vacuum with a soft brush on low suction. Dust trapped beneath a wiping cloth can scratch an otherwise sound surface.
Test minimal moisture only where appropriate. For a confirmed, sound, non-permeable finish, try a barely damp cloth on an inconspicuous area and dry immediately. Wax alone isn't proof that a surface is safe for wet cleaning.
Work in small areas. On veneered or inlaid tops, dry each section before moving to the next. This limits moisture near edges, seams, and decorative joints.
Skip detergent sprays and unverified mixtures. Residue can leave a difficult film, and an unsuitable cleaner may damage an aged coating. More cleaning product doesn't mean more protection.
Barriers That Suit Real Family Meals
Set protection beneath every contact point. Use coasters under glasses, placemats under plates, and suitable trivets under serving bowls and cookware. Smooth, nonabrasive backings matter, and hot dishes stay off finished wood unless the maker specifically allows direct contact.
Catch spills at seams and leaf edges. Blot liquid promptly, then dry the area without flooding adjacent joints. Don't let a damp placemat conceal moisture underneath.
Lift objects instead of dragging them. Centerpieces, pottery, and serving dishes can carry grit underneath. For larger gatherings, a properly selected dining-table protector pad can provide broader coverage, but it doesn't replace trivets or spill cleanup.
Adapt the setup to the activity. In a rental dining space, felt pads on chair feet help protect flooring, while a clean, washable runner can cushion the center during children's art activities. Add a washable protective work surface for paints or markers, and use trivets under takeout containers that may be hotter than they appear.
Finish with a brief reset. After guests leave, lift the coverings, remove crumbs, check for damp spots, and dry any approved cleaning area. During monthly housekeeping, read the hygrometer; at seasonal changes, inspect beneath leaves and look for fresh rings, lifted edges, or altered sheen.
Finishes That Slow Moisture Not Stop It
A protective finish is a moisture-delay system, not a permanent seal around a board. The USDA Forest Products Laboratory's Wood Handbook describes furniture-grade hardwood commonly dried to approximately 6%–8% moisture content before use. It also reports wood in service around 12% in most areas of the United States and Canada, and notes that coatings generally can't be applied successfully when surface moisture exceeds approximately 20%.
Those figures describe different conditions, not a target homeowners should try to produce with polish. Wood moisture content and room relative humidity are different measurements. A finish slows moisture exchange, but it doesn't permanently fix the wood at its original moisture level.

Finish Families and Their Care Limits
Finish names provide a starting point, not permission to use any cleaner. Formulations and factory systems differ, so the maker's care card takes priority over a general rule.
| Finish family | Strength | Weak point | Care rule |
|---|---|---|---|
| Polyurethane or conversion varnish | Resists spills well | Can cloud or wear at edges | Test a barely damp cloth in a hidden spot, then dry |
| Shellac or lacquer | Clear appearance; localized repairs may be possible | Sensitive to alcohol, ammonia, and prolonged water contact | Default to dusting; avoid homemade mixtures |
| Oil or wax | Natural feel; often straightforward to refresh | Not a waterproof barrier | Remove spills promptly; refresh only as the maker directs |
Film finishes provide a surface layer between the wood and daily use. An intact factory coating usually needs compatible cleaning, not another sealer applied over it. Adding wax or oil without approval can change sheen, leave residue, or complicate later repairs.
Shellac and lacquer shouldn't be treated as interchangeable, even though both appear in traditional furniture care discussions. Their solvent sensitivities and repair methods differ. A clear-looking coating alone doesn't identify either one.
Oil and wax systems also vary. Some modern oil-based finishes cure into more durable surfaces than a simple wax treatment, so “natural-looking” doesn't establish a maintenance schedule.
Identify the Finish Without Creating a New Mark
Start with the product paperwork, model information, and care card. The guide to understanding wood finishes offers useful background before a finish-care conversation.
Water beading can suggest water resistance, but it can't reliably identify the coating. A water-drop test can darken exposed wood, and denatured alcohol can soften certain finishes, so neither belongs on an unknown show surface; solvent identification is better left to a qualified finisher.
Ventilate after bringing a new piece indoors because composite wood, coatings, and adhesives can be indoor formaldehyde sources, as discussed in the EPA's January 2025 formaldehyde risk evaluation.
An intact factory finish needs compatible care, not an automatic extra coating. Exposed bare wood calls for a repair decision, not more polish.
Marks You Can Ease and Damage to Stop
A white ring on an otherwise sound tabletop often involves moisture in the finish rather than a stain deep in the wood. Keep the area dry, maintain steady room conditions, and allow time before attempting treatment. Flooding the ring with oil can add residue without addressing its cause.
Dining Table Marks and the Right Response
| Mark | Usual cause | Do this |
|---|---|---|
| White or cloudy ring | Moisture trapped in a sound film | Keep dry, hold humidity steady, and wait; don't flood with oil |
| Heat cloud or soft spot | Hot pan or dish | Use a trivet in future; stop treatment if the film wrinkles or stays soft |
| Dark stain in the grain | Water reached bare wood | Don't scrub; arrange professional assessment and color repair |
| Fine surface scratches | Grit or dragging | Improve dust removal; leave minor marks that don't catch a fingernail |
| Scratch to raw wood | Deep abrasion | Seek a color-matched repair, not furniture polish |
| Split, open joint, or lifted veneer | Humidity swings or deteriorated glue | Stabilize the room and stop DIY stripping |
| Flaking or unknown finish | Failed, unidentified, or antique coating | Avoid wet cleaning; consult a conservator or qualified finisher |
A fingernail check should be gentle, not an attempt to pick at the coating. Its purpose is to distinguish a superficial mark from a deeper break. Once raw wood is exposed, making the surface shiny won't restore the missing protective layer.
Dark staining needs a different response from white clouding. Scrubbing a dark patch can enlarge the damaged area or remove surrounding color, making a localized repair more difficult. Likewise, a lifted veneer edge shouldn't be pressed flat under a wet cloth or household iron.
Decide Between Observation, Touch-Up, and Refinishing
For a dry, stable white ring, observation is often the least invasive first step. Avoid heat-based internet remedies, abrasive pastes, and repeated product experiments. If the appearance doesn't improve, a finisher can assess the coating before treatment.
Professional refinishing is a meaningful investment: Fixr reported dining-table refinishing costs of $500–$2,400 in 2025, depending on size, and a national average furniture-refinishing range of $400–$1,200. A localized touch-up may be less involved than stripping an entire large pedestal table, but a written assessment should establish the repair scope.
Stop signal: Softening, wrinkling, flaking, or lifting means the task is no longer ordinary cleaning.
Protection deserves attention from the beginning of ownership. A 2024 Allstate Protection Plans survey, summarized by LCM Moving & Storage's furniture-care guide, found that 61% of reported furniture-damage incidents occurred within the first two years of ownership. Establishing coaster, trivet, and spill habits early is more useful than waiting for the first obvious mark.
For a pine piece already selected for a deliberate refinishing project, the pine finishing tips from Alex Trend Painters provide preparation context. That's a separate decision from treating a ring on an intact dining-table finish.
Routine wood-furniture care should remain gentle and predictable. If the finish is cracked, lifting, or unknown, arrange an inspection rather than experimenting on the visible tabletop.
Plan Your Next Dining Table With Us
A table used for breakfast, homework, and family meals faces different demands from one reserved for occasional gatherings. Children, pets, window light, extension leaves, and an intermittently occupied coastal home all affect which finish and setup will be practical.
Lott's Furniture serves South Georgia and North Florida with in-store and online shopping. At the showroom, our associates can help connect a table's appearance with questions about finish compatibility, seating comfort, and everyday use.
Choose the Look and the Maintenance Together
The Dining Room category includes tables, chairs and benches, dining storage, home decor, and dining sets in timeless traditional, relaxed coastal, and sleek contemporary styles. Most of our vendors offer special orders, so shoppers can explore options suited to their style, comfort, and budget.
For shoppers considering natural-wood dining tables, compare the grain and color with the care the surface will need. A finish that suits daily routines is more useful than one chosen for appearance alone.
- Bring room context. Photos of windows, vents, doorways, and nearby furniture can help our associates discuss placement and scale.
- Use a style guide as a starting point. A few simple questions can help identify your design style, without locking you into one look.
- Bring the care card and leaf measurements. The care card can clarify what products are suitable for the existing finish. Measurements help you discuss how the table will work when its leaves are in place.
Connect Online Planning With Careful Delivery
Shop in store or online, then talk with our associates about how a table's finish and seating will suit your room. Bringing a photo of the space can make those questions easier to address.
Each piece undergoes a multi-point inspection before delivery, followed by in-home delivery and placement. Careful handling matters around edges, corners, and extension mechanisms, where bumps can leave marks that resemble ordinary wear.
For a damaged top, ask about an appropriate inspection before attempting to strip or recoat it. A clear photo of the mark, the care card, and a room-humidity reading can help make the conversation more specific.
Our associates can help you consider dining-table style, finish, and everyday use together. Visit Lott's Furniture to shop online or plan a showroom visit. Bring a photo of your dining area and a hygrometer reading to discuss practical care and placement.